 What are Salesforce Campaigns?
Salesforce Campaigns are included within the Sales Cloud package, and give visibility to your Marketing team, on the performance of Marketing Campaigns. The Campaign object will show information such as, which leads have been entered into the campaign, how many opportunities have resulted, the value of the opportunities, and the value of any closed-won deals.
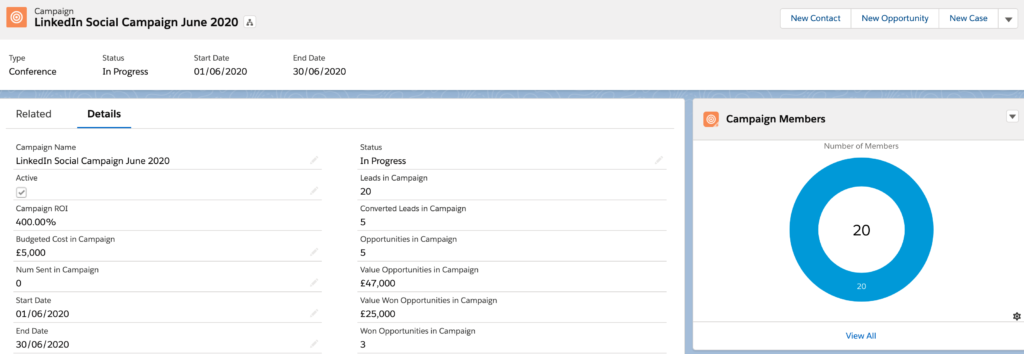
As you can see from the above screenshot, there is a whole host of information available to you about your Campaign, from the Leads, to the Opportunities, and the eventual closed won deals.
Why should you use Salesforce Campaigns?
Salesforce Campaigns are a powerful addition to you marketing suite of tools, as they provide information you can’t really get elsewhere. As all marketers know, working out your ROI on Campaigns is one of the most important aspects of your job. Being able to accurately work out the ROI for any given Campaign is what the business and your directors really want to understand.
The formula for working out ROI is simple, it’s (Sales Revenue – Marketing Spend) / Marketing Spend = Marketing ROI. But how you get there is the challenge. Luckily, if you’re using Campaigns correctly, you can easily type into Salesforce how much your Campaign cost, and then let sales do the rest by closing deals. You might have noticed in the screenshot above, that we have a field called “Campaign ROI”, this is a custom field that you can very easily add into Salesforce that automatically calulated your return. Learn how to implement it here.
How do Salesforce Campaigns Work?
Salesforce Campaigns connect together all elements in the marketing and sales cycle, allowing you to report on the metrics discussed earlier. To get an idea of which objects interact with Salesforce Campaigns, have a look at the simplified data model below. For a complete picture of all objects, check out the official data model here.
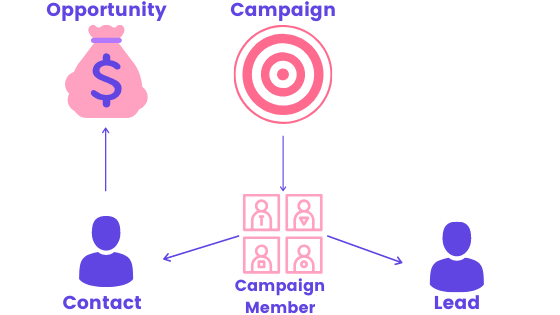
As you can see, everything is centered around the Campaign Member object, that connects together the individuals that will be associated to a Campaign. By associating these individuals to a campaign, you can track the initial response rate, the number of leads that are qualified into opportunities, and the resulting opportunity pipeline and closed won deals.
The Campaign object then rolls up information across all Leads, Contacts & Opportunities, in order to give you a complete picture of your Campaign and the results it achieved.
How do I setup Salesforce Campaigns?
Salesforce Campaigns are really easy to setup and start using, in fact, most of the setup is done completely by default. The main configuration comes from changing how you want people to be automatically associated to Campaigns, this is referred to as Campaign Influence and we will cover this later.
1. Create a Campaign
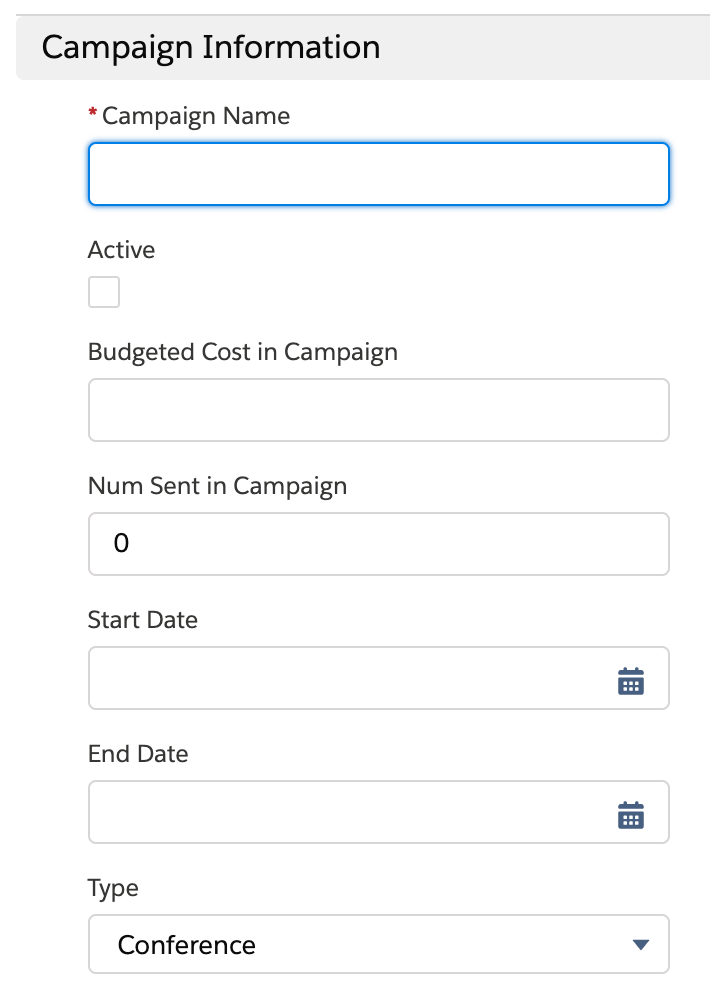
The first step is to create a Campaign in Salesforce. You can do this by navigating to the “Campaigns” tab. If you cannot see the “New” button on the far right of the screen, then you may need to tick the “Marketing User” checkbox on your user record (Or ask your Salesforce Admin to do so). You will be asked to enter a few details such as that in the screenshot on the right, information such as the budgeted cost is very important, as this helps you work out ROI later on.
2. Add Campaign Members
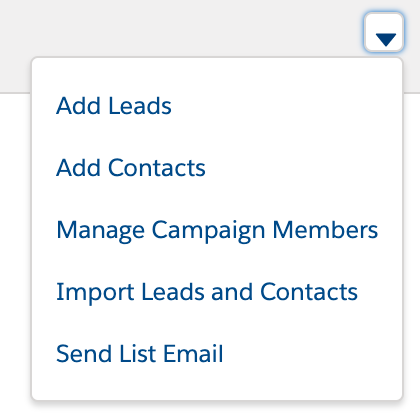
Next on the agenda is to add our Campaign Members. These are the individuals that are going to be receiving our email, webinar invite, attend an event, or whatever marketing campaign you have planned.
You will notice on your campaign that there is a dropdown button next to Campaign Members, here you can add Leads or Contacts in a number of ways. The simplest way is to click “Add Leads” or “Add Contacts” and then search for them. If you have a large amount of Leads to add, this may take too much time. In which case you can import Leads & Contacts from a CSV, or add them from a report.
3. Campaign Association
Once we have our Campaign setup, the stage is set, and hopefully, Leads & Opportunities start to be generated. There are a few different ways that the link between the revenue (Opportunity), and the campaign will be joined up. Let’s have a look at how this happens…
- Lead Conversion – If a Lead in Salesforce that is connected with a Campaign, decides they wish to learn more about your product or service and enter the sales cycle, the sales user will convert the lead. At this point, an Opportunity will be created, and the field “Primary Campaign Source”, will be automatically filled in. This completes the link from Opportunity to Campaign. It’s important to note that this will also create the contact as a “Contact Role” on the Opportunity
- Contact Association – If an existing customer that is already a contact decides they would like to enter the sales cycle, you will create an Opportunity off of the existing account. It’s important here that the sales user creates the Opportunity from the contact page, this will automatically associate the Campaign to the Opportunity, via the Contact that is a member of the Campaign. It does this by automatically filling in the “Primary Campaign Source” field.
- Manual Association – If for some reason, the above has not worked or the contact is not properly associated to the Opportunity. Then it’s possible to simply enter the Campaign into the “Primary Campaign Source” field. This obviously isn’t totally reliable and people can forget, but the next section has a solution for that!
It’s important as a marketer that the above process is understood, this is key to relating the revenue information to your Campaign. Even if the Opportunity doesn’t end up closing, the pipeline generated by your Campaign is still visible.
4. Campaign Influence & Auto-Association
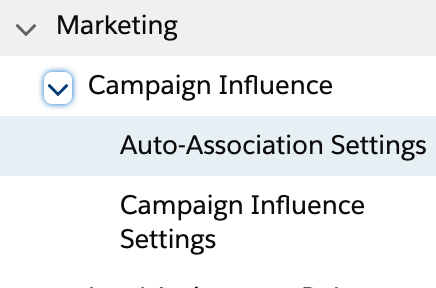
Salesforce has some slightly more advanced features from the above, to help support marketers associating Opportunities that have been influenced by multiple Campaigns, automatically. If you search “Campaign Influence” in the setup section of Salesforce, you will find the following menu items, “Auto-Association Settings” and “Campaign Influence Settings”. Let’s dive into how these can help…
Auto-Association (Campaign Influence 1.0)
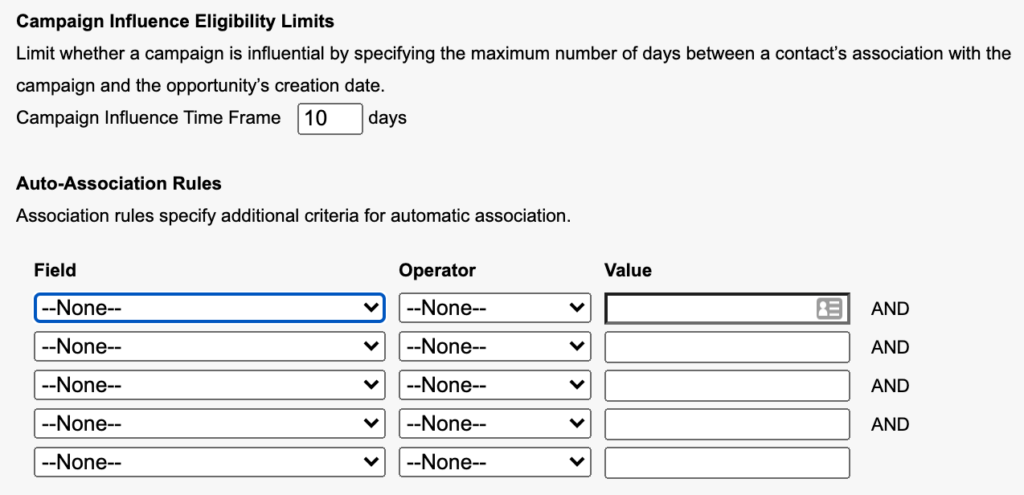
In the previous example where we covered off Manual Association, this isn’t the most reliable, as users often won’t know if an Opportunity has been influenced by a Campaign, and the link between Opp & Campaign will go unchecked. This is where Auto-Association comes in. If enabled, Salesforce will link any Opportunity to a Campaign, if the Contact associated via a Contact role has recently been linked to a Campaign. You can set the amount of days this is in effect for, as well as various other filters…
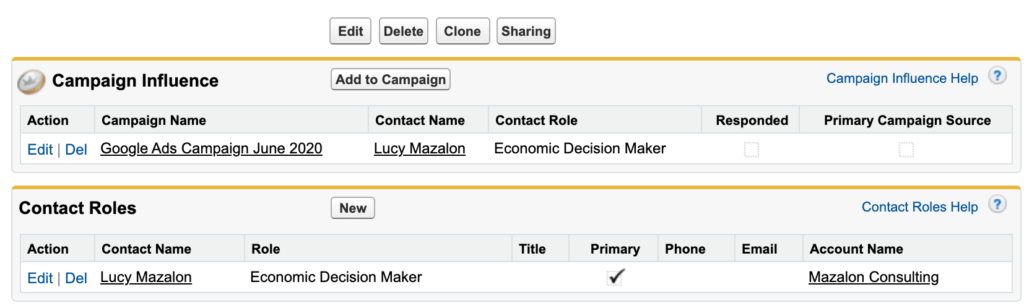
In the below example, this Opportunity was created without any Contact associated. But when I enabled Auto-Association and added Lucy as a Contact, this automatically added the recent Campaign she was listed on, under the Campaign Influence related list.
There’s a few “Gottchas” here that it’s important to understand…
- Auto-association has been around for a while, and the Campaign Influence related list you see above is only available in classic (The Lightning Version is talked about next).
- Campaigns are added under Campaign Influence but are not set in the “Primary Campaign Source” field, then no revenue will be attributed. This still has to be set manually. But the massive benefit with this feature is you can at least see which Opportunities have been influenced by which Campaigns.
- The other limiting factor of this feature is that you can only credit 100% of the revenue to one Campaign, the others are associated, but no revenue will be credited to the Campaigns other than the one in the Primary Campaign Source field.
Customizable Campaign Influence
Auto-Association is a great feature in order to credit multiple Campaigns, but in the grand scheme of the marketing technology work, it’s a pretty basic feature. Marketers now days don’t just want to see which Campaigns influenced which Opportunities, but they want to credit revenue across them. This is also known as Campaign Attribution. To learn more about Campaign Attribution, check out our blog post here.
But in a nutshell, let’s say you have 3 Campaigns influencing an Opportunity, you could choose to evenly split the $10,000 generated revenue from that Opp across the three Campaigns, so $3,333 to Campaign 1, $3,333 to Campaign 2, and the same to Campaign 3.
This feature, when enabled, looks like the following…
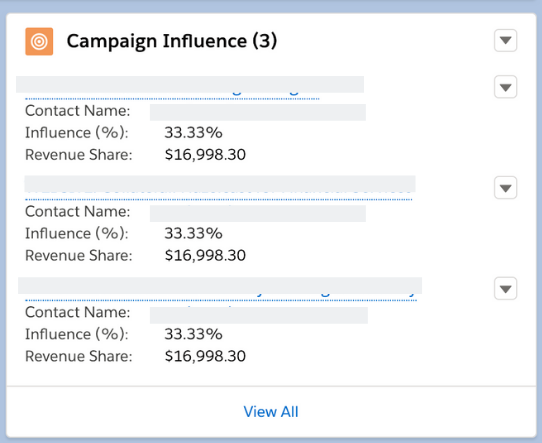
As you can see, Customizable Campaign Influence now gives you the ability to assign different shares to different Campaigns. If you had a read of the blog post that describes different ways you can allocated the revenue, this will help you understand what is possible.
Out of the box, Salesforce defines the “Primary Campaign Source” field to recieve 100% of the revenue. However, this can be changed and custom models can be added. This has to be completed via the API or using Salesforce automation, you can either find a developer to write code to define these models themselves, or purchase an App to calculate this.
Conclusion
I hope this blog post has given you a complete overview of how Salesforce Campaigns can help you business. Used properly, you can supercharge your marketing efforts by finding out exactly where your most profitable channels are!
